Below are a 4-step method, typical skills by age and 5 methods side by side, each tied to free easy drawings for kids.
How Do You Teach a Child to Draw, Step by Step?
You teach a child to draw in 4 steps: lines and shapes, looking at real objects, copying a drawing one step at a time, and then drawing freely. The CDC’s tip for 30-month-olds starts the same way: draw a straight line for your child to copy, then show a circle once lines go well.
- Teach lines, dots and circles, then simple shapes, using our beginner drawing basics.
- Look at a real object together and find its shapes.
- Copy a drawing one step at a time, with you drawing next to your child.
- Free the page: your child draws anything, with no model to match.
Toddlers spend most of their time on steps 1 and 4.
Step 1: Lines and Shapes First
Lines and shapes come first because every picture can be built from them. The Monart method, which Mona Brookes developed in 1979 through a grant from Pepperdine University, breaks all subjects into five elements of shape used like an alphabet. A Monart franchise brochure, quoted by the North Coast Journal in 2006, names them: circles, dots, and curved, straight or angled lines.
Make each element a game: a row of dots, a big circle, a straight road, a wavy snake, a zigzag mountain. Then add squares, triangles and ovals.
Step 2: Look and Draw
Look-and-draw means drawing a real object in front of you instead of from memory. Put an apple, a toy car or a cup on the table. Your child traces its outside edge in the air with one finger, then draws that edge. Edges are the first of Betty Edwards’ five component skills of drawing.
Older children can try Edwards’ upside-down drawing: copy a simple line drawing turned upside down. The parts are hard to name that way, so your child draws the lines they actually see.
Step 3: Directed Drawing
Directed drawing is an adult drawing a picture one step at a time while the child copies each step. Draw each step large, wait for your child, then move on. Our directed drawing for kids guide covers the full routine.
The how to draw a cat tutorial does this in 6 steps, from a round head and triangle ears to a curled tail and orange stripes.
-

Step 1: Draw a round circle for the head.
-
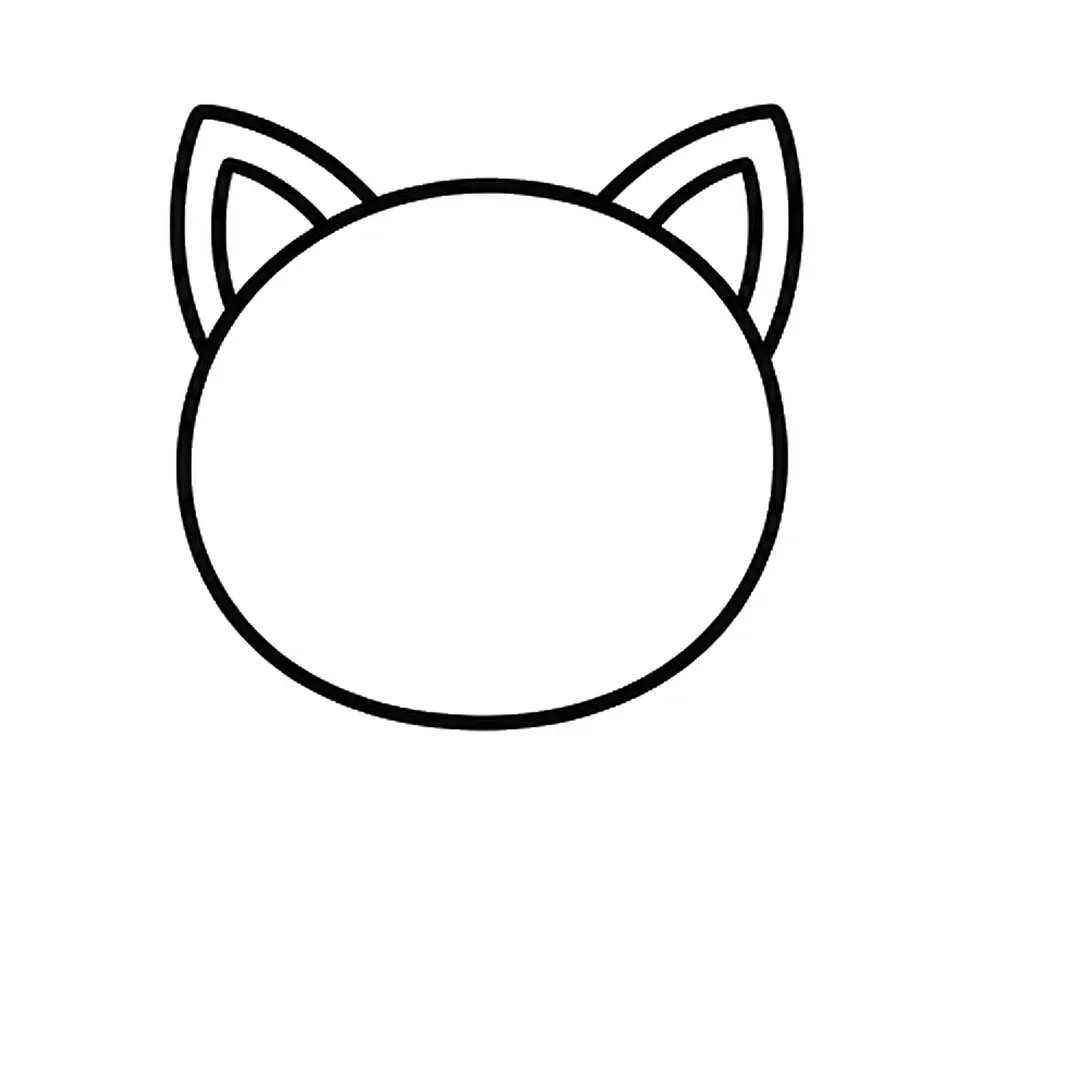
Step 2: Add two pointy triangle ears on top, each with a smaller line inside.
-
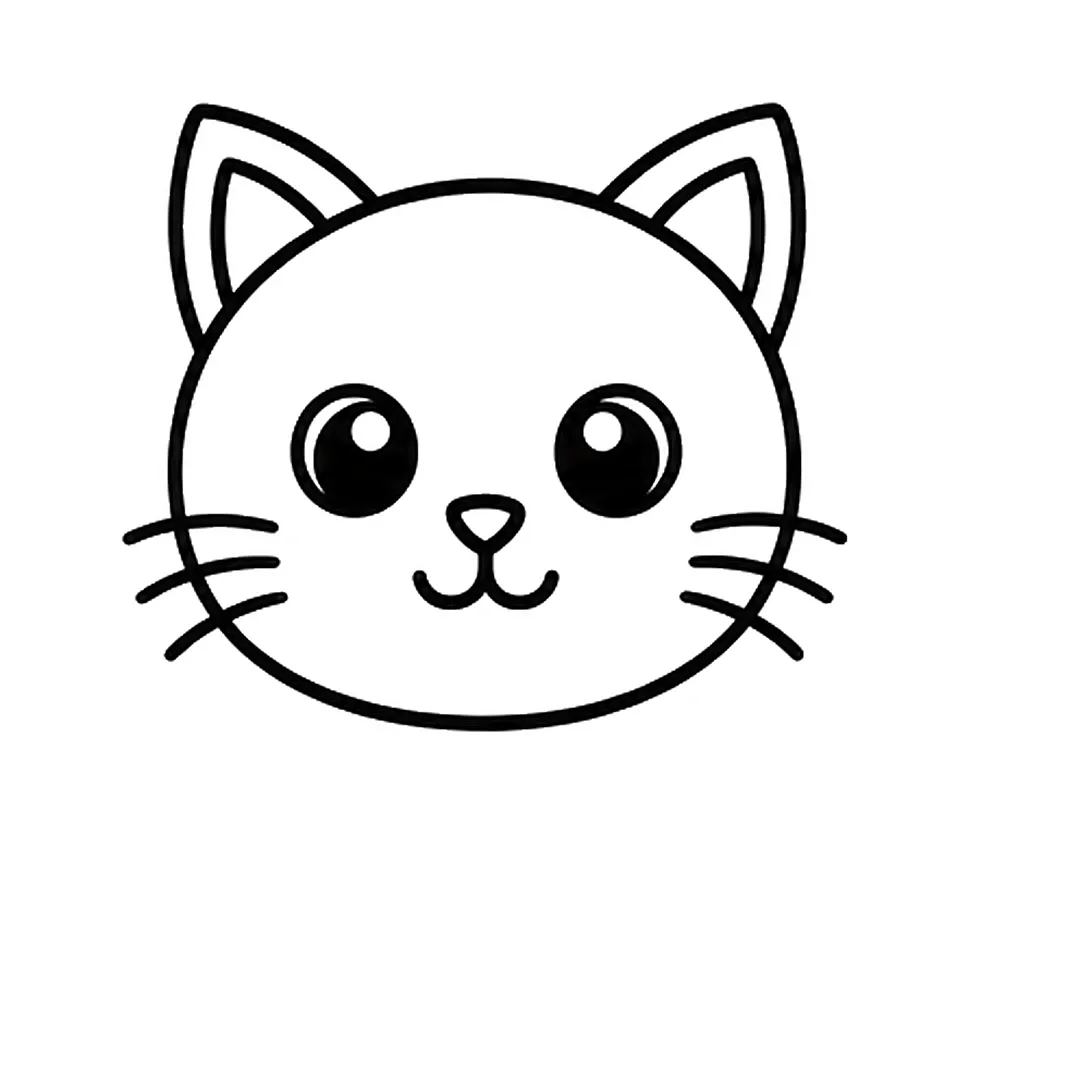
Step 3: Draw two big round eyes, a small triangle nose, a smile and three whiskers on each side.
-
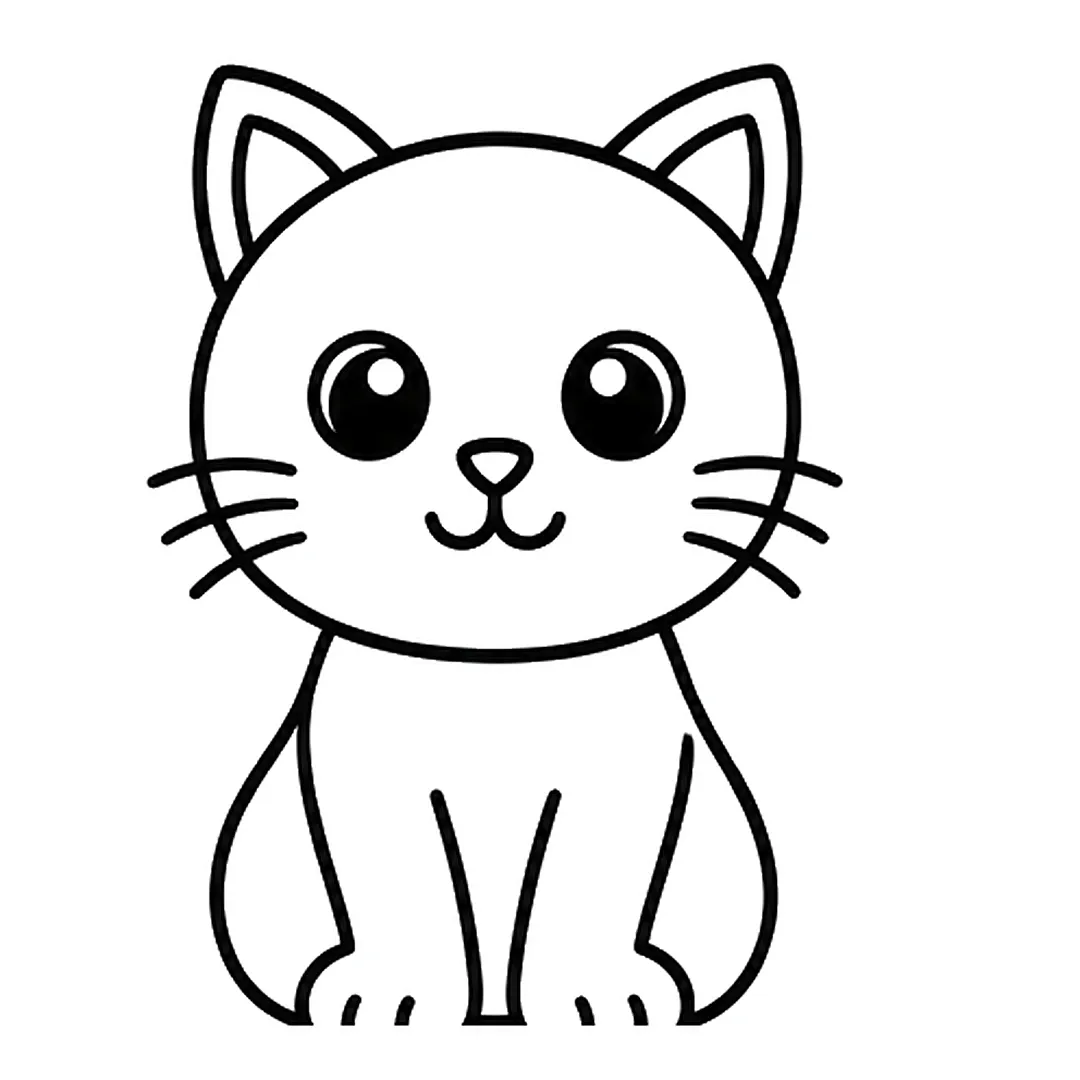
Step 4: Add a rounded sitting body with two front legs and round paws.
-
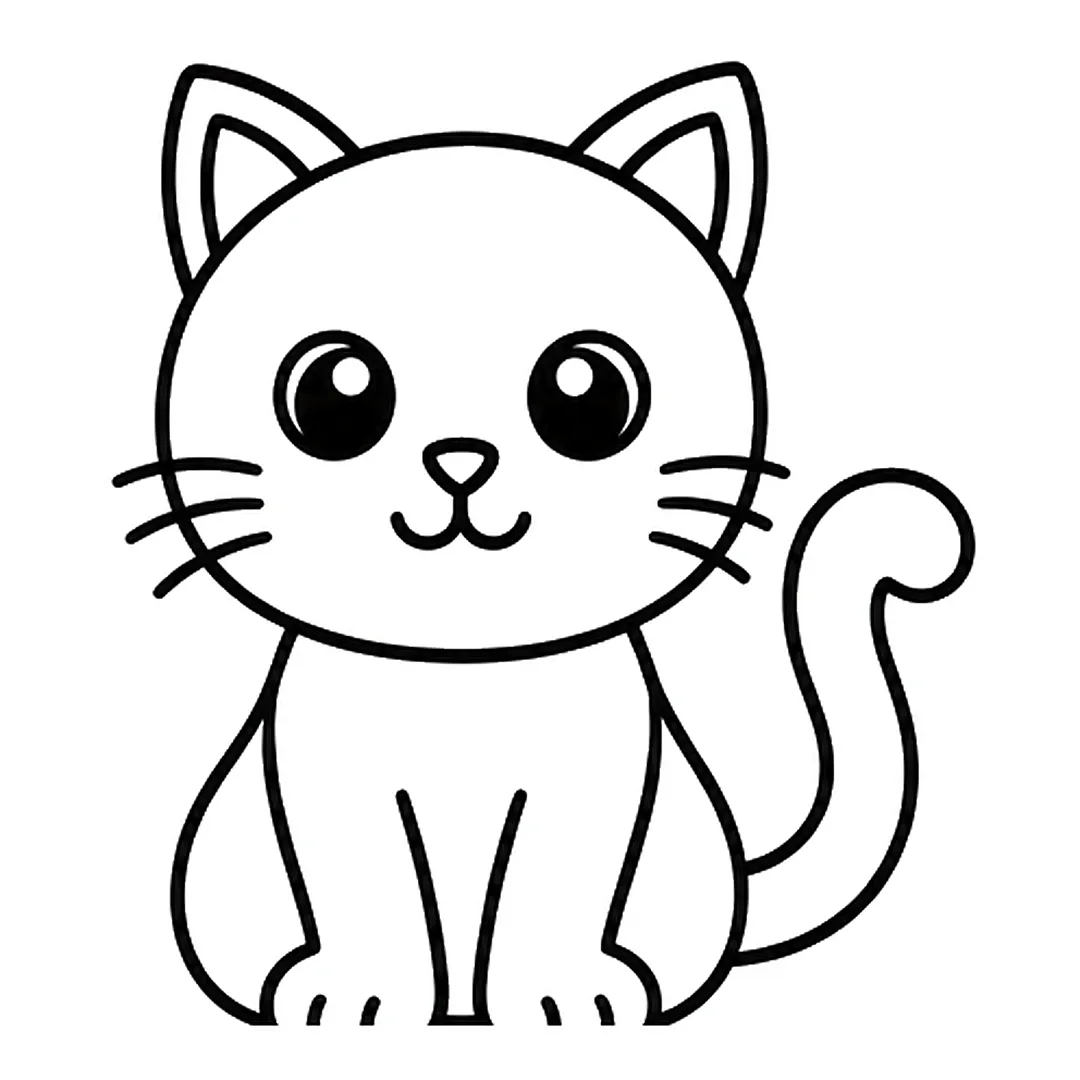
Step 5: Draw a long tail that curves up beside the body and curls at the tip.
-
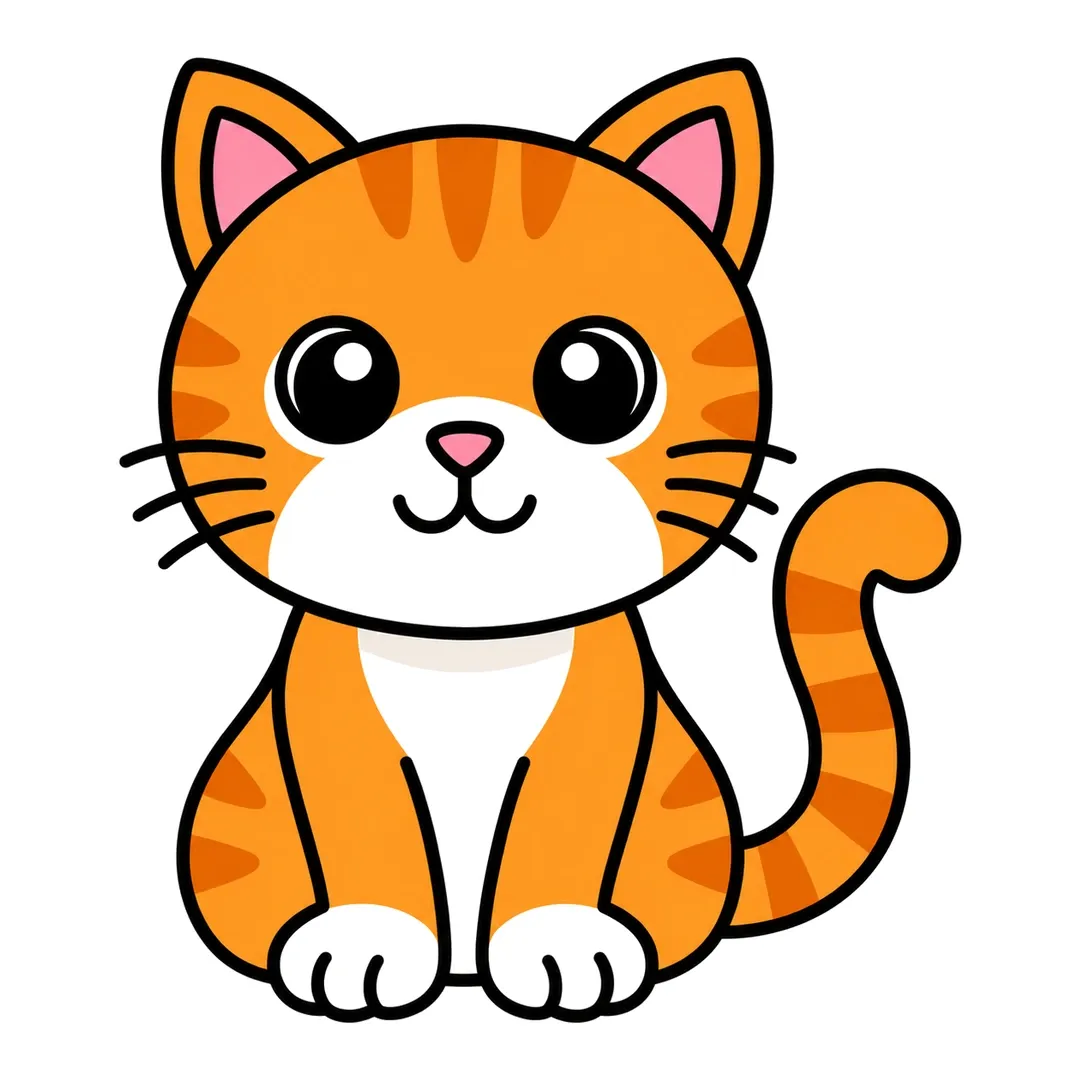
Step 6: Color the cat orange with darker stripes, and leave the muzzle, chest and paws white.
Step 4: Free Drawing

Free drawing is drawing with no model, no sample and no right answer. NAEYC calls this process art and contrasts it with product art, where a child follows a sample to a set result. The National Art Education Association (NAEA) says young children learn best through experiences that “balance instruction with emergent exploration.” After the cat, hand your child a fresh page to give it a house, a friend or a new color.
When Should You Start Teaching a Child to Draw?
You can start around age 2, when most toddlers show an interest in making marks with crayons or pencils, according to Pregnancy, Birth and Baby, a service run by Healthdirect Australia. At 2 years, the CDC suggests crayons or finger paint for spreading and making dots. Its first copying tip, a straight line, comes at 30 months.
The table draws on the CDC milestone checklists, the American Academy of Pediatrics (AAP), and Viktor Lowenfeld’s stages as charted by The Art of Education University (AOEU).
| Typical age | What many children do | What you can offer | Source |
|---|---|---|---|
| Around 2 | Show interest in making marks; scribble random lines | Crayons or finger paint for dots and spreading | Healthdirect, CDC |
| Around 30 months | Ready to try copying a line (an activity tip, not a milestone) | Draw a straight line to copy, then a circle | CDC tip |
| Around 3 | Draw a circle when shown how; can trace a square | Circles, squares, free scribbling | CDC, AAP |
| By about 4 | Draw a person with 3 or more body parts; hold a crayon between fingers and thumb | People, animals and houses made of shapes | CDC |
| 4 to 5 | Draw people with eyes, nose and mouth, sometimes with legs from the head | Tracing and copying stars or diamonds | AAP |
| By about 5 | Write some letters of their name | Short step-by-step drawings | CDC |
| 7 to 9 | Add a baseline and skyline; color starts to reflect observation | Scenes, backgrounds, real objects | Lowenfeld (AOEU chart) |
| 9 to 11 | Become more self-conscious and try for realism, perspective and overlapping | Observation drills and shading | Lowenfeld (AOEU chart) |
CDC milestones are things most children (75% or more) can do by that age. Treat each row as a typical range, not a deadline. The stages of children’s art and drawing for kids by age go deeper.
Ages 2 to 3
Ages 2 to 3 are for exploring marks, not lessons. If your toddler seems unsure, Healthdirect suggests drawing a few simple lines yourself first. It advises avoiding coloring-in and copying exercises early on, because they can limit imagination.
Ages 4 to 5
Ages 4 to 5 are a good time for shapes that stand for things, since circles start to represent people and animals (Lowenfeld’s preschematic stage, typically 4 to 7). The AAP advises against pushing a child this age in any one direction. See drawing for preschoolers and drawing for kindergarten.
Ages 6 to 10
Ages 6 to 10 are a good time for step-by-step drawings, scenes and then observation work. Once a baseline and skyline appear (typically 7 to 9), ask for a ground, a sky and one more detail than last time. From about 9, children try for realism, so the upside-down drawing in Step 2 fits.
Which Drawing Method Should You Use?
The method depends on your child’s age and goal. Shape-based methods and directed drawing suit beginners, Betty Edwards’ skills suit older children who want realism, and free drawing suits every age. Origin facts come from publishers, the methods’ own sites, NAEYC and a KPBS/NPR report on Mark Kistler.
| Method | Origin | Core idea | Use it for |
|---|---|---|---|
| Monart (Mona Brookes, Drawing with Children) | Developed in 1979 with a Pepperdine University grant; revised and expanded book edition, 1996, 304 pages | Five elements of shape act as an “alphabet” for drawing anything | Beginners learning that shapes build pictures |
| Ed Emberley drawing books | Make a World (32 pages) shows how to draw over 400 things | Pictures built from simple shapes | Beginners who want many small subjects |
| Betty Edwards, Drawing on the Right Side of the Brain | First published 1979; revised 3 times, most recently in 2012 | Five component skills: edges, spaces, relationships, lights and shadows, the whole | Older children who want realistic drawings |
| Directed drawing (step-by-step) | Mark Kistler’s PBS shows of the 1980s and early ’90s taught a step-by-step approach based on copying and tracing | The child copies an adult’s drawing one step at a time | Classrooms, mixed ages, first animal drawings |
| Free drawing (process art) | Described by NAEYC | No sample and no right or wrong way; the child decides | Every age, after or between lessons |
The “Use it for” column is our suggestion.
How Do You Help Kids Draw Lightly and Use the Whole Page?
You help kids draw lightly by giving them feedback on pressure, such as a soft pad under the paper or a mechanical pencil. You help them draw bigger by asking the main shape to reach the edges of the page. The Royal Children’s Hospital Melbourne occupational therapy team notes that some children grip tightly and press heavily.

Drawing Lightly
Light lines matter because early lines get erased later. The RCH Melbourne pencil pressure sheet suggests:
- Place the paper on a soft mouse pad or dishcloth; pressing too hard pokes the pencil through.
- Use a mechanical pencil; pressing too hard breaks the lead.
- Shade one picture in light, medium and dark gray, then talk about how pressure changes the shade.
The sheet was written mainly for handwriting in grade 3 and up, but the same tricks work on drawing lines. Lurie Children’s Hospital of Chicago adds that short pencils and short crayons help children grasp more appropriately.
Drawing Bigger
Drawing bigger is a habit you can teach with one rule: the main shape touches two edges of the paper. Before your child starts, trace the size of the first circle on the page with your finger.
How Should You Praise a Child’s Drawing?
Praise a child’s drawing by naming the effort and choices you see, such as “You kept going on those whiskers,” instead of calling the child talented. This advice comes from general research on how praise affects children, not from drawing studies.
C. M. Mueller and C. S. Dweck reported six studies in 1998, in the Journal of Personality and Social Psychology. Fifth graders praised for intelligence showed less persistence, less enjoyment and worse performance after a failure than children praised for effort. The tasks were not drawing tasks.
NAEYC articles suggest questions that keep your child talking:
- “Tell me about what you have here.”
- “What is your plan?”
- “How will you make it happen?”
When your child gets stuck, NAEYC advises waiting and giving them space to work it out. For more ideas, see how to encourage a child to draw.
What Setting and Supplies Do Kids Need to Learn to Draw?
Kids need a table, plain paper, a pencil, an eraser, a black marker and crayons. That matches the “You need” list on the tutorials on this site. Our art supplies for kids guide covers each one in more detail. For children in sixth grade or younger, the Art and Creative Materials Institute (ACMI) says to look for the AP (Approved Product) seal on art supplies.
Check 4 things before a session:
- Check for the ACMI AP seal. ACMI says never to give a product with the CL (Cautionary Labeling) seal to children in sixth grade or younger.
- Choose non-toxic materials for toddlers, which Healthdirect says won’t harm them if eaten.
- Offer short crayons and short pencils for small hands.
- Print a free step sheet, so your child sees every step on one page.
Sit next to your child, not across the table, and keep your own sheet of paper so you never draw on theirs.
What Mistakes Should You Avoid When Teaching Kids to Draw?
The mistakes to avoid are drawing on your child’s page, fixing their work, helping too fast, praising talent, copying too early and pushing one style. The last four are covered above. The first two need a word of their own, because they are the easiest to slip into.
- Drawing for your child. In an NAEYC article, teachers of 2- and 3-year-olds saw children rate their own work below the teachers’ drawings, so the teachers stopped drawing for them.
- Fixing the drawing. NAEYC lists “adults feel the need to ‘fix’ the art” as a sign of product art.
If you hear “Mine doesn’t look right,” a phrase NAEYC links to product art, add more free drawing.
How Is Teaching Drawing in a Classroom Different From Teaching at Home?
Teaching drawing in a classroom relies on one shared demonstration that the whole class follows together, while teaching at home lets you follow one child’s pace and interests. Both use the same 4 steps, but the classroom leans on directed drawing and home leaves more room for free drawing.
In the Classroom
Each tutorial on this site has a “Show steps on the board” button, so the whole class sees the same step at once. End each lesson with a few minutes of free changes, so every drawing ends up different. More ideas are in classroom art ideas.
At Home
At home, let your child’s interests pick the subject: a tutorial when they ask “How do I draw a horse?”, free drawing the rest of the time. See homeschool art lessons.
Drawing as a Learning Tool
Drawing is also a way to remember what you learn. In 7 experiments, J. D. Wammes, M. E. Meade and M. A. Fernandes (University of Waterloo, 2016) found that drawn words were recalled better than written ones. The participants were undergraduate students, not children. NAEYC adds that drawing builds small motor skills, which are important for future writing. Our why drawing is good for children page reviews more of that research.
What Free Resources Help You Teach Kids to Draw?
Free resources for teaching kids to draw include step-by-step tutorials, printable step sheets and a free drawing book. On this site, every how-to-draw tutorial breaks one subject into 4, 6 or 8 steps. Each tutorial page offers a free step sheet PDF by email.
- Browse the drawing ideas for subjects by theme.
- Download 20 Easy Drawings for Kids, a free 44-page PDF where each of the 20 drawings has 6 numbered steps.
- Print a one-page step sheet for any tutorial; the step sheets page sends the link by email.
- Follow a structured set of drawing lessons for kids.
Outside this site, Art for Kids Hub offers video lessons, and the Emberley and Brookes books teach shape-based drawing on paper. For themed printable packs with step, tracing, coloring and draw-and-write pages, see the shop.
Where Should You Start Today?
Start today with one shape game, one step-by-step drawing and one free page. Draw dots, circles and lines together, follow the how to draw a cat steps, then hand over a blank sheet. Grab a free step sheet or the free drawing book to plan the next lesson.